This post has been moved to our new site. Head on over there now!
Friday, August 15, 2014
Friday, July 25, 2014
Family Traditions
One of the things that I haven't blogged about much is how we are preparing our family for bad times mentally and emotionally. Today, I'll talk about traditions and why they are important.

I found a good ask.com article on why you should have family traditions. See the full article here.
In summary, family traditions:
1.) Provide opportunities to share happy memories.
2.) Give family members a greater sense of belonging.
3.) Help impart family values to the children.
4.) Provide children with a foundation and with security as they develop their identities.
In my opinion, traditions are great! I love having traditions that I can pass on to my children. My parents used to sing us to sleep when we were kids. I sing my children to sleep. It's incredibly fulfilling to be able to say that. BUT I find that it is important to keep from getting "stuck" in traditions.
We need to be open to change and development of our traditions. You can keep from getting stuck with your family traditions by changing it up. Say every Saturday is Pancake day. Mom makes the pancakes, and she always does fun shapes. But what happens when mom is sick? Or what about when you are on a family vacation? What if one of your family members realizes they are allergic to gluten, or they decide to join a religious group where it becomes against their religion to eat pancakes?

I know that that last one sounds like a bit of a stretch but it is important to be aware of, and sensitive to each members needs, regardless of how silly you may find them. That is why our traditions need to be open to development and change. If our traditions are unbending, our family members will be unbending, too. In life it is important to be flexible and learn to roll with the punches.
Our family is no different from any other family in that we all need traditions. Here are some of my favorites.
-Every Saturday is PANCAKE DAY! I like to make fun shapes and every time, I get better and better at it! The kids help mix and they all get to test the first one to see if it's okay. (I'm going to post more on this later!)
-Every night we read books, and then we sing songs until the kids are asleep. Sometimes I sing songs that I remember my mom and dad singing to me. Sometimes I sing songs that Chris' parents sang to him. Sometimes I sing songs that I've made up for my kids, or other songs that I like. This is how this tradition is growing!
-We go on trips to visit with extended family. We want to foster relationships with our extended family because it is yet another foundation stone to figuring out identity. If anything should happen to me or my husband, I want my children to feel safe with their extended family. I want them to know about me, so they can learn about themselves!
-We go on family vacations. While this can be the same trip as visiting with extended family, it is not the same. When we go on "vacations" we experience the world and culture around us. We see monuments, learn about history, and enjoy our civilization at large.

We may have just started a fishing tradition too. There is a little lake just down the road from us and yesterday, we decided to go fishing. It was so easy to get things together for it, we brought binoculars, and the kids and I looked at nature. I think that we will do it again. On a regular basis. And that it's how traditions are started!

Tuesday, July 8, 2014
The Path Not Taken

As I sit here and wonder about why I'm feeling down (cause sometimes I do), I am reminded of a poem by Robert Frost that has always held great meaning in my life; The Path Not Taken.
"Two roads diverged in a yellow wood,
And sorry I could not travel both
And be one traveler, long I stood,
And looked down one as far as I could,
To where it bent in the undergrowth.
Then took the other just as fair
Having perhaps the better claim,
Because it was grassy and wanted wear.
Though as for that, the passing there
Had really worn them about the same.
And both that morning equally lay
In leaves no step had trodden black.
Oh! I saved the first for another day.
Yet knowing how way leads on to way,
I doubted that I should ever come back.
I shall be telling this with a sigh,
Somewhere ages and ages hence.
Two roads diverged in a wood, and I--
I took the one less traveled by.
And that has made all the difference."
I can see how my choices in life have brought me here. I do not regret the paths I've taken. In fact, most days I am quite happy with living on property that we own with my beautiful family. We have a lot of love and a lot of blessings and I don't want to sound ungrateful.
I AM BLESSED!
But,
oh! How slow the progress goes! And oh! I don't like how things always seem to go wrong! Sometimes I feel like the movement is backwards.
I just have to keep reminding myself that "I shall be telling this with a sigh/somewhere ages and ages hence/two roads diverged in a wood, and I--/I took the road less traveled by/and that has made all the difference!"
Wednesday, June 25, 2014
Innovation in Raising Chicks...
Chris and I came up with an awesome way to raise chicks. As far as we know, no one else has done this before, but please don't hesitate to comment below to tell us if you have done this! We would love to share the credit!
This NEW WAY to raise chicks came about because Chris doesn't like to clean up poop. His train of thought probably went something like this:
"I am so excited about baby chicks! BUT I really don't like cleaning up the poop, and you know they poop alot... Maybe Lindsay will do it... (Lindsay shoots glaring eyes in his direction) Nope, that's out of the question... I have worms composting stuff already, I wonder if they will compost the baby chicken poop. I could keep them IN the worm bin and then I won't have to clean anything up! I just have to keep the top from getting compacted...I'll use a cultivator to rake and turn the dirt. OH! and by the way, this will give the little guys a chance to learn how to scratch and eat worms! Great food supplement... This is a really great idea! Let's do it!"

Here are some things that we learned from it:
1.) Don't use newspaper unless it's shredded up really small. It compacts too easily. Instead, use sawdust or wood shavings. These work really great for retaining the moisture for the worms and they don't get too compacted.
2.) Keep the birds in an appropriately sized container. Too many birds = Too much compaction/poop/eating of worms = No more worms = No more worms composting the chicken poop! I'd say that 6 chicks or less in one of those big plastic totes is plenty. We had almost thrice that many. It was too many. (Yes I just used the word thrice! Isn't that awesome!)
3.) Don't forget to add kitchen scraps like onion peels, bell pepper leftovers, and the like. The worms need food, and so do the chicks. They will both benefit from eating these. You will probably still have to feed the chicks some sort of chick feed and grain, but you'll certainly need a lot less of it, and your birds will be healthier. (or so I think)
4.) Don't forget to provide your chicks with some sort of roost. Otherwise, they WILL roost on top of each other and some of your birds may get smothered. Just a warning...
5.) Make sure to turn the worm dirt at least every couple of days. It will keep the "dirt" from getting compacted and give the chicks a chance to eat the worms that are lying below the surface. Chris really liked to get in there everyday, but I think that you could do it every other day and be just fine.
19 Chickens and Counting!
Actually we did have 20. We decided to use Chris' rotisserie to get rid of a rooster that was being meddlesome. But that's besides the point!
WE HAVE 19 CHICKENS AND ONE OF OUR HENS IS SITTING ON A CLUTCH OF EGGS!

I'm so excited to see if we actually get some little chicks. It looks like our hen Millie is sitting on about 10 eggs. It would be cool if we got just one little chick! But we will have to wait and see.
All in all we have 4 Ameraucanas, 4 Red Fryer, and 5 Australorp chicks that we bought from our local feed store on the 11th of April. We have what looks like a Rhode Island Red Rooster and a couple of interestingly colored hens of unknown breed that were given to us shortly before that. Plus we have a rooster
We let them free range and we love everything about it. Well, everything except the poop and getting into the garden! That's why we have fences...

Just in case you are looking for a little education on how to keep chickens, let me 'esplain a few things:
Here are some reasons to keep chickens:
1.) They produce eggs! If you do it right, raising hens to produce your own eggs can be cheaper and more rewarding than picking up a dozen from the grocery store... IF YOU DO IT RIGHT!
2.) They make great compost! When you manage your chickens properly, you can produce all of the compost you will ever need for your garden and yard.
3.) They can keep your lawn mowed, aerated, and fertilized!
4.) They make great pets... Not necessarily the kind you keep on a leash, but it has been done!
Really the list goes on.
As far as how to keep chickens, it's really simple. Here are some things that your flock will need in order to be happy:
1.) Feed. This can come in the way of food waste in a compost pile and be supplemented with the proper grains, insects from your garden and yard, forage from plants that you planted for them, etc. You'll have to wait for another post from me about feeding chicken's for free or check out this video from Geoff Lawton, or read this book. Both are awesome.
2.)Hen House. The Chickens need some sort of house that will contain the nesting boxes and roosts. This can come in so many different forms and can be anywhere from permanent to movable. There are lots of options here!
3.) Roosts. Chickens like to roost at night on sticks, trees, anywhere that is up high and protected. We have a hen house that is currently under construction, but when it's done I'll post photos. Roosting is instinctual for chickens. They'll find some place to roost no matter what so it's important that you give them a specific place to do it or else you'll have to deal with the consequences of birds pooping where you don't want them too!
4.) Nesting Boxes. These boxes provide a designated spot where your chickens can lay their eggs. If you don't have nesting boxes, be prepared to go on egg hunts and find rotten eggs all over your property!
5.) Fencing, and the like. Chickens will go where they want to go. If you need to keep them contained, or restricted from certain areas, then you will need to invest in some sort of fencing, plant borders, and more.
AND if you want help designing a system for keeping chickens, give us a call! Chris is starting his Permaculture Design Consulting business and needs some clients! Chicken systems are one of the many things he can do for you.
WE HAVE 19 CHICKENS AND ONE OF OUR HENS IS SITTING ON A CLUTCH OF EGGS!
I'm so excited to see if we actually get some little chicks. It looks like our hen Millie is sitting on about 10 eggs. It would be cool if we got just one little chick! But we will have to wait and see.
All in all we have 4 Ameraucanas, 4 Red Fryer, and 5 Australorp chicks that we bought from our local feed store on the 11th of April. We have what looks like a Rhode Island Red Rooster and a couple of interestingly colored hens of unknown breed that were given to us shortly before that. Plus we have a rooster
That we bought to butcher for Chris' class that didn't get butchered.
We let them free range and we love everything about it. Well, everything except the poop and getting into the garden! That's why we have fences...
Just in case you are looking for a little education on how to keep chickens, let me 'esplain a few things:
Here are some reasons to keep chickens:
1.) They produce eggs! If you do it right, raising hens to produce your own eggs can be cheaper and more rewarding than picking up a dozen from the grocery store... IF YOU DO IT RIGHT!
2.) They make great compost! When you manage your chickens properly, you can produce all of the compost you will ever need for your garden and yard.
3.) They can keep your lawn mowed, aerated, and fertilized!
4.) They make great pets... Not necessarily the kind you keep on a leash, but it has been done!
Really the list goes on.
As far as how to keep chickens, it's really simple. Here are some things that your flock will need in order to be happy:
1.) Feed. This can come in the way of food waste in a compost pile and be supplemented with the proper grains, insects from your garden and yard, forage from plants that you planted for them, etc. You'll have to wait for another post from me about feeding chicken's for free or check out this video from Geoff Lawton, or read this book. Both are awesome.
2.)Hen House. The Chickens need some sort of house that will contain the nesting boxes and roosts. This can come in so many different forms and can be anywhere from permanent to movable. There are lots of options here!
3.) Roosts. Chickens like to roost at night on sticks, trees, anywhere that is up high and protected. We have a hen house that is currently under construction, but when it's done I'll post photos. Roosting is instinctual for chickens. They'll find some place to roost no matter what so it's important that you give them a specific place to do it or else you'll have to deal with the consequences of birds pooping where you don't want them too!
4.) Nesting Boxes. These boxes provide a designated spot where your chickens can lay their eggs. If you don't have nesting boxes, be prepared to go on egg hunts and find rotten eggs all over your property!
5.) Fencing, and the like. Chickens will go where they want to go. If you need to keep them contained, or restricted from certain areas, then you will need to invest in some sort of fencing, plant borders, and more.
6.) Grit. Chickens don't have teeth. They have a really cool organ called a gullet and they need grit like sand or oyster shell to "chew" their food. Mostly chickens find their own grit but you can also provide them with it in a dish separate from their food.
If you can have chickens, I highly recommend it. It is one of the most rewarding and exciting experiences for me as a city-turned-farm-girl.
AND if you want help designing a system for keeping chickens, give us a call! Chris is starting his Permaculture Design Consulting business and needs some clients! Chicken systems are one of the many things he can do for you.
Wednesday, May 14, 2014
Oh, The Heat!
A full week of 80 degree weather... in May! I don't have air conditioning and I am not sure how I am going to survive!

I'm sure there will be lots of playing in the pool and taking the kids into the cool forest where the sun doesn't beat so uncaringly.
In other news, I've officially started a new freelance writing business. Check out my website, http://lindsayhodge.weebly.com.
Saturday, May 3, 2014
Building a New Rabbit Hutch
When we bought our rabbits last fall, we built a temporary hutch over the garden for them. It was made out of a couple of logs and a couple of poles. The roof was a tarp with some tin on top. It has been working really well, but now, it's time to build a more permanent hutch. So Here's what we built:


If you remember from one of my sketches, we are planning on putting worm bins underneath to help compost the bunny droppings. I had the idea after reading an article about rabbit droppings and then we read about it in Toby Hemenway's book, "Gaia's Garden." It was fun to make the connection. The roof will be a little different, but the idea is still the same.
The rabbits love their new home...
 |
| This is Claire the Hare. She is the most rotund of the bunnies. She was just content to sit in the corner and watch it all happen. |
 |
| This is Roxy the Rex. She was the most curious. |
 |
| This is Barnaby Buck. He was sniffing around and then he was like, "I'm just gonna lay down for a minute..." |
Anyways, we'll post more photos as soon as it's finished.
Thursday, April 17, 2014
Learning about Bees
 |
| A Warre Hive that Chris Built. |
One of the many facets of our homestead will be bees. We love bees. They help pollinate plants, and honey bees provide you with another harvest: Honey! Not to mention we have heard that they are a very rewarding hobby. We have been studying bees and beekeeping on the internet, and it was a natural segue for me to take the certification course through our local beekeeping association when the opportunity arose.
I really enjoyed the course from the Lewis County Beekeeper's Association. They are a very knowledgeable group and they tend to have a very open mind when it comes to doing things naturally. I really appreciated that! I am a certified Apprentice Level Beekeeper now.
That being said, I am still on a journey to finding my own best practices for beekeeping, and I may end up doing things differently than they taught. I also listened to a podcast from Paul Wheaton at Permies.com titled "Reverence for Bees" with Jacqueline Freeman. She lives here in Western Washington and she has her own ideas about keeping bees! I really enjoyed her style, but I haven't learned enough to share yet, so I'll post more later. For now, I will say that she says to leave the bees alone, horde your own honey incase you need it to feed your bees, and she likes Warre Hives (which we like too!). This seems to me, to be a very natural and healthy way to raise bees. Hmmm.... I'm still learning!

Roxy the Rex had Babies!
Even though I haven't mentioned the rabbits much, they are a part of the daily routine here on the homestead. Not only are they routine, they are also an integral part of "The Plan." When I say plan I mean the overarching plan for what we want to accomplish here on Haven Homestead.
Something that we have learned from Geoff Lawton's Online PDC is "Each element performs more than one function, and each function is provided by more than one element." This is how diversity breeds stability. (SOOO COOL!)
 |
| You can see the nest of hair in the corner in front of the nest box. |
So our rabbits fit into the master plan by providing us with compost/fertilizer and meat, not to mention they are really nice to hold! Now, they are not the only elements providing us with meat or compost or entertainment (see the post on my artsy blog about chicken's deflating...), but those are the functions that they provide.
So in the order of providing meat, we had Barnaby (a Silver Fox) mate with Roxy (a Rex). Chris knows more about why we have those kinds of rabbits, so I'll ask him and report back, but that's another post for another day.
Friday of last week, Roxy had her first litter! It was quite unexpected because we have been trying for a litter for a while. She didn't pull the fur out of her tummy to make a nest until that night (we were expecting her to give birth a few days before, and Chris thought she'd pull her fur a few days before giving birth) Then we woke up and went to check on the animals on Saturday morning and she had little babies lying in a nest of fur ON THE FLOOR OF THE CAGE! We had given her a nesting box but we think it was too small. We read that you are supposed to leave the rabbits alone for the first 24 hours after birth so we check on them on Sunday and we were sad to find that of the litter of 6, only one little kit survived, and he was hungry.
We did our best to try to save him. We held Roxy still and let him nurse off of her for the first two feedings, but that was a two person job and Chris wasn't going to be able to help during the week. We read that kitten milk replacer was the best option, (DON'T use cow's milk) so we went to the feed store and bought some. We fed him 2x a day, stroked his tummy so he could defecate, and we left him alone the rest of the day. That's what the momma rabbit would do, so we did our best to replicate nature.
Unfortunately, little Benny-Angelina (Emma named it) died on Tuesday Morning in spite of our best efforts.
It was exciting to have the litter, dissapointing when we discovered the faulty nest box, exciting to try to take care of a kit, and sad when he passed on.
We will be trying for more litters, and now we know better. Here's to better results from our next litter.
 |
| Little Benny-Angelina Abby Hodge. That is what Emma says his full name is. |
 |
| Nursing the baby on Roxy was really stressful for all parties involved, but we felt it was necessary for the first few feedings. |
We did our best to try to save him. We held Roxy still and let him nurse off of her for the first two feedings, but that was a two person job and Chris wasn't going to be able to help during the week. We read that kitten milk replacer was the best option, (DON'T use cow's milk) so we went to the feed store and bought some. We fed him 2x a day, stroked his tummy so he could defecate, and we left him alone the rest of the day. That's what the momma rabbit would do, so we did our best to replicate nature.
Unfortunately, little Benny-Angelina (Emma named it) died on Tuesday Morning in spite of our best efforts.
 |
| Emma and Benny-Angelina |
It was exciting to have the litter, dissapointing when we discovered the faulty nest box, exciting to try to take care of a kit, and sad when he passed on.
We will be trying for more litters, and now we know better. Here's to better results from our next litter.
Sunday, April 13, 2014
The Swing of Spring: News and Updates on the Homestead
Where do I start! I have so much to catch up on, and so much to keep up with that I don't know where to begin... Here's a list and some photos:
-We Got the deed for our property (We got the deed in the mail the day that my parents came in for their visit, and I was so excited that I had them take a picture of me with it!)
 -My parents and youngest brother came out for a visit over spring break (so much fun!)

 -Our bunny, Roxy the Rex had a litter on Friday night (I'll be posting more in a bit)
-We got our next flock of chickens on Saturday (we bought 15 chicks from the local feed store)
-Our garden is planted (mostly... more in another post)
-Emma started preschool (posts on this later..)
-Thanks to our little helpers, the pump house has walls, a window, a roof, a door and a floor! We just have to finish the outside and then begin working on the interior! (also another post)
 -I'm officially an apprentice level beekeeper!
-Chris and I started our first Permaculture Design Course (Also a whole 'nother post... maybe a series of posts!)
-We have a nearly complete gravel driveway... just needs some more tractor work... Did I mention we have a tractor? I'm sure we did...
-Plus, Chris is still working, I am still writing children's stories and articles for my local newspaper.
I'm sure there is more but I can't think of anything else right now, so here's just a pretty photo of some of my favorite wild flowers here on the homestead. Does anyone know what they are?

-We Got the deed for our property (We got the deed in the mail the day that my parents came in for their visit, and I was so excited that I had them take a picture of me with it!)
-Our old flock of hens started laying again! (another post..)
-We got our next flock of chickens on Saturday (we bought 15 chicks from the local feed store)
-Our garden is planted (mostly... more in another post)
-Emma started preschool (posts on this later..)
-Thanks to our little helpers, the pump house has walls, a window, a roof, a door and a floor! We just have to finish the outside and then begin working on the interior! (also another post)
-Chris and I started our first Permaculture Design Course (Also a whole 'nother post... maybe a series of posts!)
-We have a nearly complete gravel driveway... just needs some more tractor work... Did I mention we have a tractor? I'm sure we did...
-Plus, Chris is still working, I am still writing children's stories and articles for my local newspaper.
I'm sure there is more but I can't think of anything else right now, so here's just a pretty photo of some of my favorite wild flowers here on the homestead. Does anyone know what they are?
Monday, March 24, 2014
Trouble with the Dogs
What happens when you purchase a hunting dog to help you be a better hunter, but you decide to become a homesteader instead? Sometimes your hunting dog hunts the animals you are trying to raise.

I've talked a little about how Molly, our Weimaraner of 4+ years, ate our ducks and chickens. It isn't getting better and we've tried everything we can think of.
Now, with Hunter's allergies and ear issues, and with Molly's determination to eat our farm birds, we have come to the burdensome decision to find them a new home. They are good dogs, high energy and highly intelligent. They just deserve a better home.
They are going to a foster home tomorrow. It's a bittersweet time for us here on the homestead.
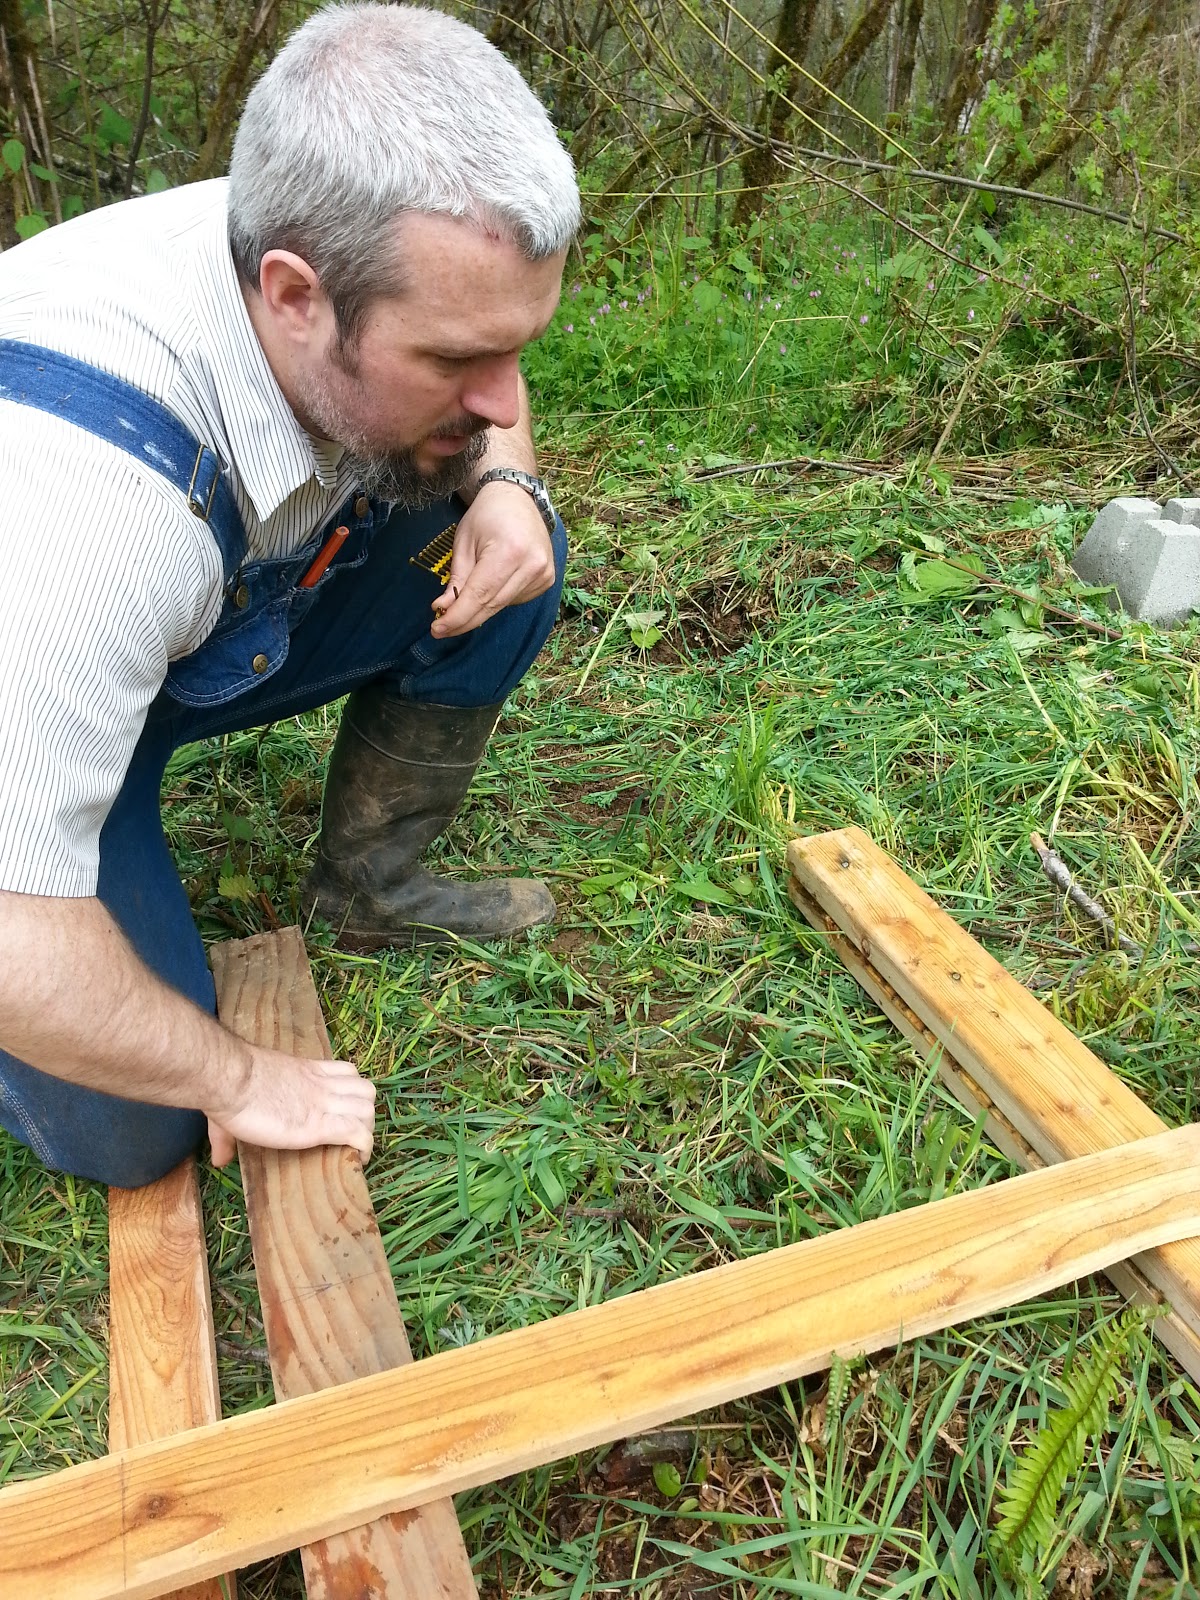
Our First Outdoor Picnic of 2014!
We have been having some absolutely beautiful weather this last week. Temperatures in the middle of the day have been in the mid- to high 60's (that's Farenheit) and the sun has been out every day since Tuesday or Wednesday... I have been LOVING it!
Yesterday, we felt that we just had to grill and eat outside. It was still a bit chilly and it was too early for the watermelon that would have completed the awesomeness, but it was still just amazing to enjoy the sun!
I thought I'd share some photos and a Fun Burger Recipe!


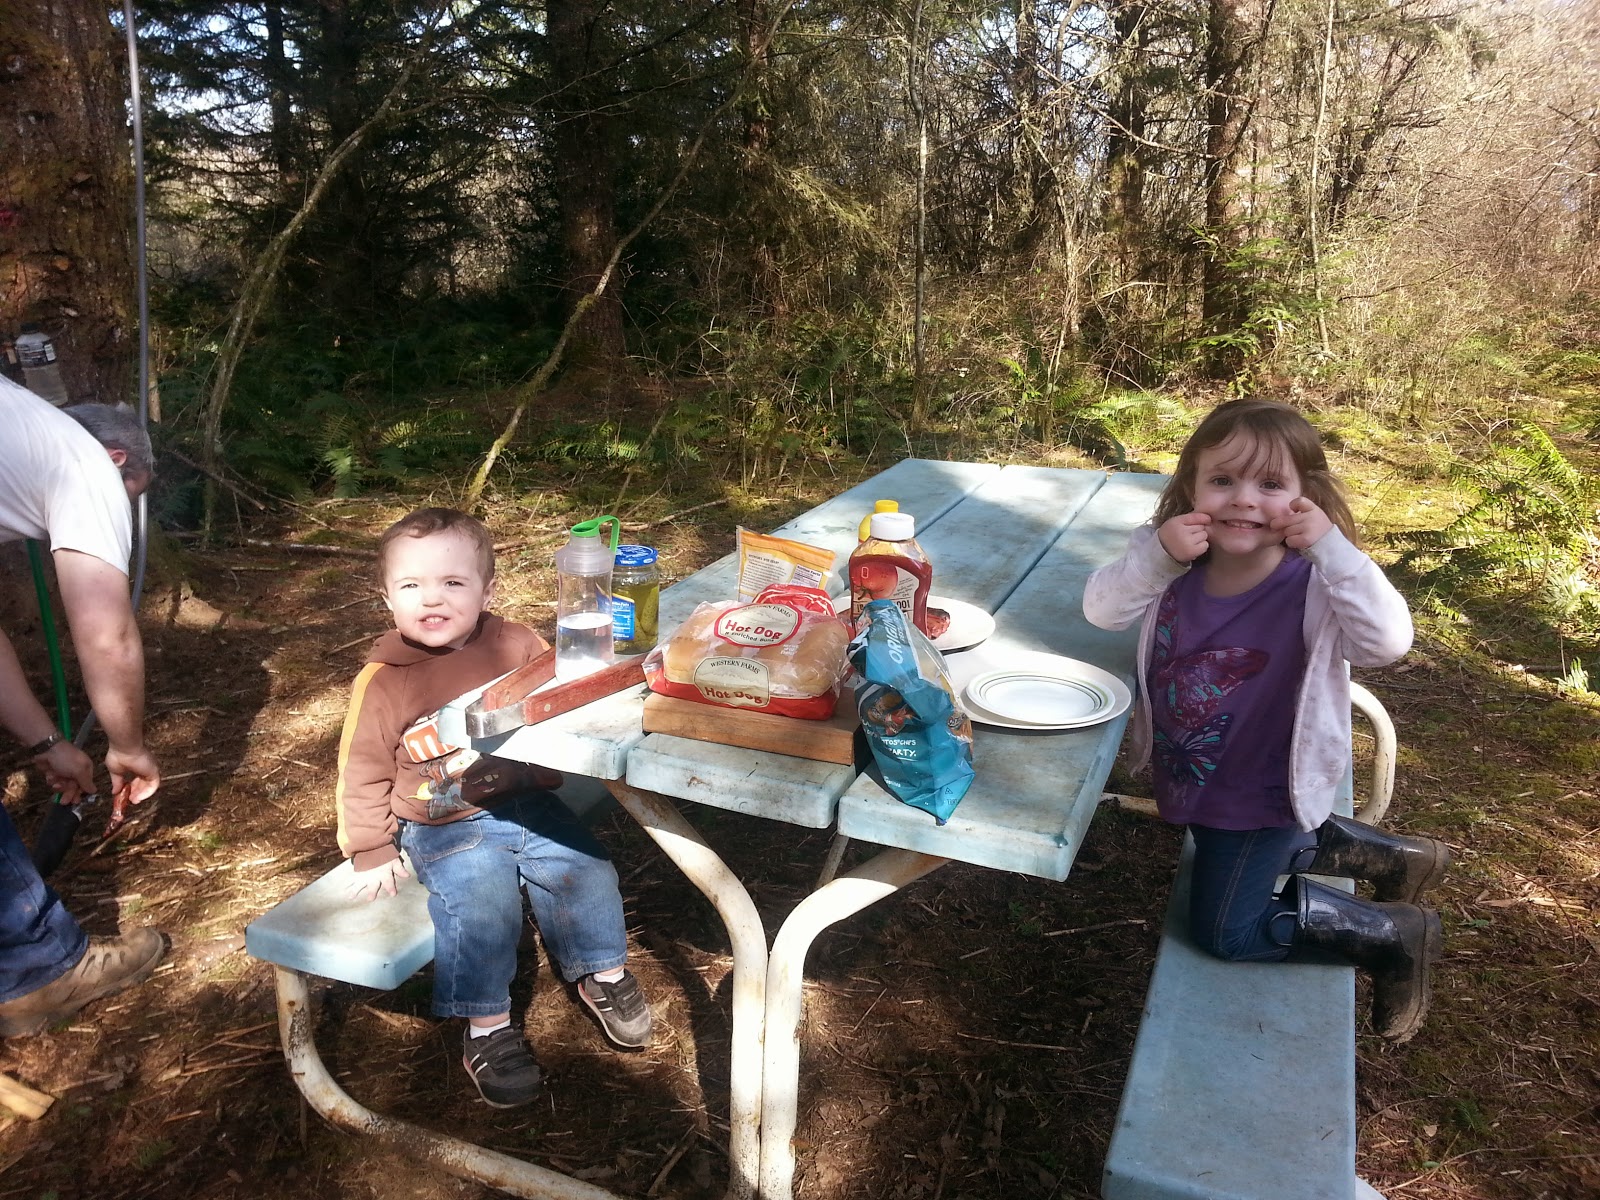

Chris' Hot-gers (the name has not quite been figured out yet)
Ingredients:
1 lb Ground Beef
1 egg
1/4 C. Cheese, shredded
1/2 tsp. Salt
1 pkg Hot Dogs
1 pkg Hot Dog Buns
Ketchup, mustard, relish, mayo or any other sauce that you're feeling:)
Directions:
Combine ground beef, eggs, cheese and salt in a large bowl. Form into long, skinny, flat, hot dog bun shaped patties. Grill burgers and hot dogs until done. Put one burger patty AND one hot dog in a bun and dress with your favorite sauces. Feel free to add more cheese on top of the burgers, and or slice the hot dogs to make them easier to eat. Enjoy!
This is how Chris enjoyed the picnic yesterday... I think I may have to try it next time!
Friday, March 21, 2014
Straw Spinning Tips: Conditioning your Bales
The first "issue" I have had with my straw bale garden is not an issue with the garden itself. It's with my water situation.
When you get started with a straw bale garden the first step is to condition the bales. You add a high nitrogen fertilizer to the bales about every other day and water it every day, for 10 days. Then you let it rest for a couple of days before you add a well balanced fertilizer (something with phosphorus and potassium, as well as nitrogen) and then you can start planting in your bale some time around day 12. Your bales are supposed to start cooking with in a few days. By that I mean, your bales should be visibly hotter than the air around. I think they are supposed to get up to about 140*F... I'll have to check on that number to be sure. At, or around day 12, your bales should be cooling off, but still warm enough to help seeds start up to two weeks earlier than normal gardens.
Here we are, nearly two weeks after I got my bales and my bales haven't even started "cooking." I have applied the necessary nitrogen, but the last two times I watered, I noticed that it wasn't soaking in to the bales. It was sitting on top and running off the sides. Watching the blood meal run down the sides was like watching someone light money on fire! I paid good money for that, and it was being wasted on the ground around the bales! I had to figure something out.
Yesterday I went out to the bales to water them again. This time I thought that I would help it along by roughing up the blood meal, and forcing it into the bales with my hands. I discovered a few things.
First of all, the water from my watering can is not at a high enough pressure to penetrate the bales and force the fertilizer into the bales. The inside of the bales were dry and as clean as they were when I brought them home.
Second, the bales we got were really compacted. That is a good thing, but difficult when you don't have good water pressure. Like I said, they were dry inside! No wonder my bales weren't cooking.
Third, my hands are not strong enough to force ANYTHING into ANYTHING!
Fourth, 5 gallons of water per bale, for 16 bales is not enough water. The bales
After these discoveries, I decided to take my cultivator (that claw-like garden tool thingy) and break up the tops of the bales. Those bales were so tough to break up that I bruised my hands! (*pout*) I spent a good two hours on 16 bales, breaking up the top-most layers of straw. While I was doing that, I was thinking about how water works, and I decided to make a little trough down the center of the bales. It will hold in the fertilizer and the water so I'm not pouring money on the ground! Just be careful not to break any strings. They are there to help keep your "container" together and if you break them, the bale will fall apart.
Another discovery I made was that bales purchased in the fall, and have been wet all winter, are much easier to work with. We have one bale from our mulch garden bed that was just sitting next to the garden, the strings were still intact, so we decided to use it. It was almost easier to cultivate than my wet spring soil! I'm not sure if it will have the same temperature reaction that the new bales will have, but I'll do my best to find out more info/record my temperatures so that I can share more discoveries later.
I'm restarting my count on the bales with yesterday as Day 1, since my bales weren't even wet inside! What a bummer! It'll be good to keep a better record anyways. So, here we go again!
 |
| This is what the tops of my bales looked like. The blood meal had clumped up and acted like a water barrier. That kept the inside of my bales nice and dry... bummer major! |
When you get started with a straw bale garden the first step is to condition the bales. You add a high nitrogen fertilizer to the bales about every other day and water it every day, for 10 days. Then you let it rest for a couple of days before you add a well balanced fertilizer (something with phosphorus and potassium, as well as nitrogen) and then you can start planting in your bale some time around day 12. Your bales are supposed to start cooking with in a few days. By that I mean, your bales should be visibly hotter than the air around. I think they are supposed to get up to about 140*F... I'll have to check on that number to be sure. At, or around day 12, your bales should be cooling off, but still warm enough to help seeds start up to two weeks earlier than normal gardens.
Here we are, nearly two weeks after I got my bales and my bales haven't even started "cooking." I have applied the necessary nitrogen, but the last two times I watered, I noticed that it wasn't soaking in to the bales. It was sitting on top and running off the sides. Watching the blood meal run down the sides was like watching someone light money on fire! I paid good money for that, and it was being wasted on the ground around the bales! I had to figure something out.
Yesterday I went out to the bales to water them again. This time I thought that I would help it along by roughing up the blood meal, and forcing it into the bales with my hands. I discovered a few things.
 |
| Dry and clean... Bummer major again! |
First of all, the water from my watering can is not at a high enough pressure to penetrate the bales and force the fertilizer into the bales. The inside of the bales were dry and as clean as they were when I brought them home.
Second, the bales we got were really compacted. That is a good thing, but difficult when you don't have good water pressure. Like I said, they were dry inside! No wonder my bales weren't cooking.
Third, my hands are not strong enough to force ANYTHING into ANYTHING!
Fourth, 5 gallons of water per bale, for 16 bales is not enough water. The bales
After these discoveries, I decided to take my cultivator (that claw-like garden tool thingy) and break up the tops of the bales. Those bales were so tough to break up that I bruised my hands! (*pout*) I spent a good two hours on 16 bales, breaking up the top-most layers of straw. While I was doing that, I was thinking about how water works, and I decided to make a little trough down the center of the bales. It will hold in the fertilizer and the water so I'm not pouring money on the ground! Just be careful not to break any strings. They are there to help keep your "container" together and if you break them, the bale will fall apart.
 |
| You can kind of see the trough in the center. |
I'm restarting my count on the bales with yesterday as Day 1, since my bales weren't even wet inside! What a bummer! It'll be good to keep a better record anyways. So, here we go again!
Tuesday, March 18, 2014
Planting in Guilds and a new CHILDREN'S BOOK!
Chris and I have been talking for some time about writing a series of children's books that promotes sustainable living. I know, I know... We are a little crazy! But today I finished the first draft of a children's book that does just that! AND it's awesome.
The main character for our series is Hortense the Honey Bee and the stories are about her adventures as a forager. (Before you go all "what-kind-of-a-name-is-Hortense" on me, let me explain... Hortense comes from the latin word meaning Garden... plus I like old fashioned names:-))
The first book is called "Hortense the Honey Bee and the Giant Tomato Tree," and while I am NOT going to publish it here on the blog I do want to say that I love personification! AND I love how I was able to creatively tie in concepts like companion and guild planting and beneficial insects into it, without sounding too "Hippy," as my dad calls it. If you are interested in hearing more, leave me a comment below or visit my art blog!
Just in case you were wondering what I mean by companion/guild planting, I'll explain. Companion and guild planting is where you put a group of different plants together to help support each other. For example, Onions and Tomatoes grow really well together. Beans, Corn and Squash are also a great little guild. My favorite (simply because I love Cherries) is a Cherry Tree Guild. I'll be posting on that later!
Let me explain further. You plant beans with corn and squash because the beans fix nitrogen, and corn is a heavy nitrogen eater and the squash acts as a ground cover that keeps weeds out, and it enjoys the nitrogen as well. Plus the corn stalks are a built-in trellis for your beans! They all work together to make a crop that is bigger, and healthier than it would have been if they were planted on their own.
If you have a plant that is susceptible to a fungus, plant it with one that has antifungal properties. If your plants are famous for attracting the wrong sort of insect, plant it with one that either repels the delinquent insect, or that attracts a predator for the delinquent. You get the idea.
All things work together in nature. You just have to help them out sometimes.
The main character for our series is Hortense the Honey Bee and the stories are about her adventures as a forager. (Before you go all "what-kind-of-a-name-is-Hortense" on me, let me explain... Hortense comes from the latin word meaning Garden... plus I like old fashioned names:-))
The first book is called "Hortense the Honey Bee and the Giant Tomato Tree," and while I am NOT going to publish it here on the blog I do want to say that I love personification! AND I love how I was able to creatively tie in concepts like companion and guild planting and beneficial insects into it, without sounding too "Hippy," as my dad calls it. If you are interested in hearing more, leave me a comment below or visit my art blog!
 |
| I sketched this out while I was writing the book... I know the "tomato tree" looks more like an apple tree., BUT it's supposed to be a tomato tree, so use your imagination! |
Just in case you were wondering what I mean by companion/guild planting, I'll explain. Companion and guild planting is where you put a group of different plants together to help support each other. For example, Onions and Tomatoes grow really well together. Beans, Corn and Squash are also a great little guild. My favorite (simply because I love Cherries) is a Cherry Tree Guild. I'll be posting on that later!
Let me explain further. You plant beans with corn and squash because the beans fix nitrogen, and corn is a heavy nitrogen eater and the squash acts as a ground cover that keeps weeds out, and it enjoys the nitrogen as well. Plus the corn stalks are a built-in trellis for your beans! They all work together to make a crop that is bigger, and healthier than it would have been if they were planted on their own.
If you have a plant that is susceptible to a fungus, plant it with one that has antifungal properties. If your plants are famous for attracting the wrong sort of insect, plant it with one that either repels the delinquent insect, or that attracts a predator for the delinquent. You get the idea.
All things work together in nature. You just have to help them out sometimes.
Friday, March 14, 2014
Spring Has Arrived!
I think it's official. Spring is here. I know that because many of my plants and trees have decided that it's time to start leafing out and putting out buds and flowers! I love the spring!
Here are some photos of the arrival of spring here at Haven Homestead! If you wanna see more, check out our website!


Here are some photos of the arrival of spring here at Haven Homestead! If you wanna see more, check out our website!
Wednesday, March 12, 2014
A fun quote about eternity...
Heard this on a podcast with Geoff Lawton.
Made me think about how long it's taking to develop the property.
I need to remember that anything worth doing will take some time.

Spinning Straw Into Gold: The First Steps
As with any good project, the first steps should include learning everything that you can about the project, make a plan, and get started.
So far we have learned a bunch, but not everything yet (We are working on it though:)), we have a rough idea (but not a plan), and we got started this weekend.
It was an awesome day. We left in the morning with Chris driving Rowdy (our one-ton truck) and me and the kids in Syd (our Subaru Outback) to fetch some straw.
We came back with 15 bales of straw, a plastic green house, and two sleeping babies.
The kids got to ride in Rowdy and they had a ton of fun. While they were sleeping, Chris and I unloaded the straw. In the rain.
And finally, we placed the bales. We also started conditioning the bales per Joel Karsten's instructions.
Next up: Continued conditioning, posts and wires, and then we plant our seeds!
In other news, we got our first sprouts in the little A-frame cold frame we made! I think they are raddishes... big surprise!
The Pump House Project
Earlier this year we decided that the first structure that we would build on the property would be our pump house. We have so many things to do to make this homestead a productive place. We have plans for a better chicken coop, a better rabbit hutch, and a better dog run. We have plans for an awesome garden and food forest. We have plans for the main house, the bunkhouse cabins, and more. Sometimes it feels a little overwhelming when we talk about all of the things that we have planned and the limitations that we have to deal with, but after all of our many discussions, we settled on the Pump House as the first permanent structure for the homestead.
It will contain:
- The pump and water Treatment equipment
- A small water heater
- A washer and dryer
- A small shower
- A utility sink and counter (for folding and stuff)
I'm so excited for it that I can hardly contain myself. I just wish we had the money at once instead of having to buy things a little at a time.
We started building right before that polar vortex hit us. We laid out the blocks just to see what it would be like. It's going to be about 8'x12' and in the picture below, it's only 8'x8'. We were just checking to see how big it would be and we had started to level the ground.


That back blade helped us to level the ground in about 5 minutes! It was awesome. He's already pulling his weight around here and we are so excited.
Two Saturdays ago, we got the floor framed up.


And we were able to put the floor down and raise two walls on Saturday last! Right now we have an awesome tarp/plywood/2'x4' improvised roof to keep it all dry, and we are hoping to get some more done soon. I'll keep updating as it goes!
Subscribe to:
Posts (Atom)